How to optimize WordPress post revision storage
This article discusses how to optimize storage for WordPress post revisions.
About WordPress post revision storage
The post revisions feature in WordPress enables you to undo changes you have made and revert to an earlier version (revision) of a post. Post revisions are saved permanently in the database whenever you save, update, or publish a post.
By default, WordPress stores an unlimited number of revisions for a post. However, it is possible to gain a performance benefit by limiting the number of post revisions stored in the database.
For example, if you do not need to recover previous version often, you can set a limit of 10 stored revisions per post. Alternatively, if you frequently revise posts and want to be able to retrieve previous versions in the future, a higher limit like 50 or 60 may be reasonable. In many cases, however, sites benefit from a lower limit of stored revisions, leading to smaller database sizes (and as a result smaller backup file sizes also).
Checking stored revision settings with the A2 Optimized plugin
The A2 Optimized for WordPress plugin enables you to quickly get an idea of the current post revision storage setting for your site. To do this, follow these steps:
- Log in to WordPress as an administrator.
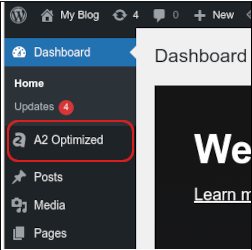
- In the left sidebar, click A2 Optimized:
Click the Optimization tab:

In the left sidebar, click Best Practices:
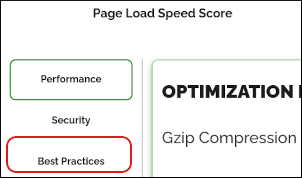
In the Best Practices section, scroll down to the Post Revisions section:

You see one of two messages:
- GOOD: WordPress is currently configured to store less than 100 post revisions.
- WARNING: WordPress is currently configured to store more than 100 post revisions.
Changing the number of stored revisions
You can quickly and easily change the number of post revisions that WordPress stores. To do this, follow these steps:
- In the directory where you installed WordPress, open the wp-config.php file in your preferred text editor.
- Locate the following line:
/* Add any custom values between this line and the "stop editing" line. */
Copy the following text, and then paste it into the wp-config.php file below the line you located in step 2:
define( 'WP_POST_REVISIONS', X );
Replace X in the text you pasted in step 3 with one of the following values:
- true: Store every revision.
- false: Do not store any revisions (except one autosave per post).
- A number greater than 0: Store a maximum of that number of revisions per post.
- Save your changes to the wp-config.php file and exit the text editor. The new setting takes effect immediately. You can verify this with the A2 Optimized plugin as described in the previous procedure.
Deleting old post revisions
You can clean out old post revisions from the database if you no longer need them. This results in a smaller database and may improve site performance. To do this, follow these steps:
- Log in to cPanel.
If you do not know how to log in to your cPanel account, please see this article.
- On the Tools page, in the Databases section of the cPanel home screen, click phpMyAdmin:

In the left sidebar of phpMyAdmin, click the WordPress database. A list of tables in the database appears.
Typically, the WordPress database is username_wpXXX, where username represents your cPanel username, and XXX is a three-digit number.- On the top menu bar, click SQL.
Copy and paste the following statement into the SQL query text box. Replace prefix with the table prefix for your database:
DELETE FROM prefix_posts WHERE post_type = "revision";- Click Go. phpMyAdmin removes the revisions from the database and tells you how many rows it deleted.
More Information
For more information about post revisions in WordPress, please visit https://wordpress.org/documentation/article/revisions/.
Article Details
- Level: Beginner
Grow Your Web Business
Subscribe to receive weekly cutting edge tips, strategies, and news you need to grow your web business.
No charge. Unsubscribe anytime.
Did you find this article helpful? Then you'll love our support. Experience the A2 Hosting difference today and get a pre-secured, pre-optimized website. Check out our web hosting plans today.